
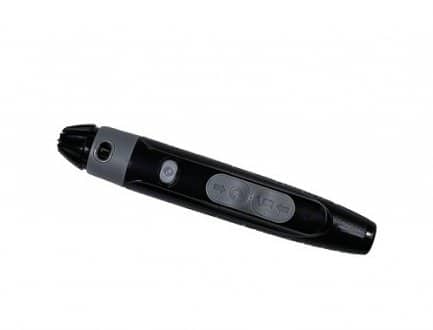
A lancing device is a small spring-loaded tool that holds a sterile lancet and makes a quick, controlled skin puncture for a blood drop. It is most often used for finger-stick blood glucose testing. Understanding what is a lancing device matters because technique, depth, lancet choice, and hygiene can affect comfort, sample quality, and infection risk.
The device does not measure glucose by itself. It helps you collect capillary blood, which is then applied to a test strip and read by a glucose meter. If you are learning the full testing routine, the basics of meter selection are covered in Best Glucometer For You.
Key Takeaways
- Core role: Creates a controlled puncture for capillary blood.
- Lancet difference: The lancet is the small sterile needle inside.
- Comfort factors: Gauge, depth, site choice, and warmth matter.
- Safety habit: Use a fresh lancet and dispose of sharps properly.
- Result quality: Clean hands and gentle sampling support reliable readings.
What Is a Lancing Device Used For?
A lancing device is used to obtain a small blood sample for testing, most commonly during home glucose monitoring. People with diabetes may use one with a glucose meter and test strips to check blood sugar at times recommended by their care team. It can also be used for other capillary blood tests when the testing system calls for a finger-stick sample.
The tool is sometimes called a lancet pen device, finger pricker, or glucometer lancing device. These names describe the same basic idea: a holder that releases a tiny lancets needle quickly, then withdraws it. The quick motion helps reduce dragging through the skin.
Timing for blood sugar checks depends on the person, treatment plan, meals, activity, illness, pregnancy, and medication risk. Some people are asked to test before meals, after meals, at bedtime, or when symptoms suggest low or high glucose. Your clinician should provide the schedule that fits your situation.
Why it matters: The device collects the sample; the meter and strip interpret it.
Lancing Device and Lancets: The Difference
The lancing device and lancets work together, but they are not the same item. The device is the reusable holder and trigger mechanism. The lancet is the sterile, sharp tip that actually punctures the skin.
A lancet is usually a small steel needle with a protective cap. It may fit into a reusable pen-style device, or it may be built into a disposable finger pricker. Many home systems use replaceable lancets, while safety lancets are designed as single-use units with the needle enclosed before and after the puncture.
Common lancets for diabetes are described by gauge. A higher gauge number usually means a thinner needle. For example, a 33G lancet is typically thinner than a 28G lancet. Thinner lancets may feel gentler for some people, but they can produce smaller drops. Thicker options may help when skin is callused or circulation is reduced.
Compatibility is important. Some lancets fit many pen-style devices, while others are designed for a specific system. If you need a deeper comparison of lancet types, selection factors, and safety habits, see Lancets For Blood Sugar Testing.
How the Device Works
A lancing device works by loading spring tension, then releasing the lancet in a straight, fast motion. The lancet tip enters the skin briefly and retracts, creating a tiny opening for blood. Most devices include a cap, lancet holder, cocking mechanism, trigger button, and depth control.
Depth settings help match the puncture to the skin. A shallow setting may be enough for thin or sensitive skin. A deeper setting may be needed for thicker skin, cold hands, or calluses. Start with the lowest setting that reliably produces an adequate blood drop, unless your device instructions say otherwise.
Some caps are designed for fingertip testing only. Others allow alternate-site testing, such as the forearm or palm, when the meter and care plan permit it. Alternate sites may be less tender, but they can lag behind fingertip readings during rapid glucose changes. Fingertips are usually preferred when symptoms do not match a reading, after exercise, after meals, or when low glucose is suspected.
For device-specific technique, Delica Lancing Device explains how one common pen-style system is used.
How to Use a Lancing Device Safely
Safe use starts with clean hands, a new sterile lancet, and a steady puncture site. The goal is a blood drop that forms easily without excessive squeezing. Squeezing hard at the puncture site can mix tissue fluid into the sample and may affect some readings.
- Wash and dry hands: Use warm water and soap, then dry fully.
- Load a new lancet: Insert it firmly without touching the tip.
- Set the depth: Choose the shallowest setting that gives enough blood.
- Choose the site: Use the side of the fingertip, not the central pad.
- Press and trigger: Hold the cap flat against the skin before pressing.
- Form the drop: Massage gently from the base of the finger if needed.
- Apply to strip: Follow your meter and strip instructions for timing.
- Discard the lancet: Place it into an approved sharps container.
If you are learning how to use lancing device steps with a meter, read the strip instructions closely. Some strips draw blood from the edge. Others require a specific angle or sample size. The related workflow in How To Use Glucometer can help connect lancet technique with meter handling.
Quick tip: Warm hands often produce a better drop with less pressure.
Comfort: Depth, Gauge, and Finger Rotation
The least painful lancing device is usually the one that fits your hand, holds the lancet securely, and allows precise depth adjustment. No device is painless for everyone. Comfort depends on skin thickness, nerve sensitivity, lancet gauge, puncture site, and how often the same finger is used.
Use the side of the fingertip when possible. The fingertip pad is more involved in touch and can become sore with repeated punctures. Rotate fingers and locations across the day. Avoid puncturing bruised, infected, swollen, or visibly irritated skin.
Lancet reuse can make testing more uncomfortable because the tip may become dull or contaminated after use. A fresh lancet is sharper and cleaner. It also reduces the risk of transferring blood or microorganisms back into the skin.
Examples of commonly used lancet supplies include OneTouch Ultra Soft Lancets, Accu-Chek Softclix Lancets, and Microlet Lancets. Product pages can help you compare naming and compatibility, but your device instructions should guide what fits.
Safety Lancets, Universal Devices, and Travel Use
Safety lancets are disposable finger prickers with an enclosed needle. They are often used in clinical settings, travel kits, or situations where a person wants a one-piece option. Many activate once and cannot be reused.
A universal lancing device is intended to accept many standard round lancets, but the word “universal” does not guarantee every lancet will fit. A poor fit can cause a crooked puncture, weak spring action, or painful misfire. Always compare the lancet shape and device instructions before use.
Keep supplies clean and dry during travel. Store unused lancets with protective caps intact. Carry a puncture-resistant container for used sharps, especially if you test outside the home. Never leave used lancets loose in a bag, car console, or bedside drawer.
If you use a meter kit, make sure the lancing device, lancets, strips, and meter are all packed together. A browseable diabetes supply collection is available under Diabetes Products for general category navigation.
How to Insert a Lancet Into a Lancing Device
Most pen-style devices follow the same basic loading pattern, although details vary by brand. Remove the cap, insert the lancet into the holder, twist off the protective cover, replace the cap, and cock the device if required. Keep fingers away from the exposed tip while loading.
Do not force a lancet that does not seat smoothly. Forcing mismatched parts can bend the needle or damage the holder. If the cap will not close, the trigger will not set, or the lancet wiggles inside the barrel, stop and check compatibility.
Some people ask how to use a lancet without device support. A bare lancet can puncture skin, but it gives less control over depth and angle. It also increases the chance of accidental sticks during handling. A pen-style device or single-use safety lancet is usually safer and more consistent for routine testing.
Cleaning, Disposal, and When to Replace It
Clean the outside of the lancing device according to the manufacturer’s instructions. Many devices can be wiped externally, but they should not be soaked unless the instructions clearly allow it. Moisture inside the barrel may affect spring movement.
Do not share a lancing device with another person, even if you change the lancet. Blood can remain on the cap or internal parts. Shared finger-stick devices have been associated with infection-control concerns in care settings.
Dispose of used lancets immediately in a sharps container or another puncture-resistant container allowed by local rules. For official disposal principles, review the FDA’s home sharps safety guidance. Local pharmacy, municipal, or public health programs may also provide disposal instructions.
Replace the device if the spring feels weak, the trigger misfires, the cap cracks, or punctures become inconsistent despite new lancets and proper depth settings. A damaged device can make testing more painful and less predictable.
How It Fits With Glucose Monitoring
A lancing device is only one part of blood glucose monitoring. A typical setup includes a meter, test strips, lancets, a sharps container, and sometimes a logbook or app. The lancing step affects the sample, while the meter and strip affect the displayed result.
Finger-stick testing and continuous glucose monitoring are different tools. A sensor worn on the arm measures glucose in interstitial fluid, which is fluid between cells. It does not use a lancing device for every reading. Some people still need finger-stick checks to confirm symptoms, calibrate certain systems, or follow clinician instructions.
If you are comparing monitoring tools, FreeStyle Freedom Lite Meter shows how one meter is presented with its compatible testing ecosystem. For broader education and condition navigation, you can also browse Diabetes Articles or the Diabetes Condition collection.
Authoritative Sources
For broad diabetes self-monitoring context, the American Diabetes Association publishes annual Standards of Care in Diabetes with evidence-based guidance for clinicians.
For home sharps handling, the FDA provides sharps safety recommendations for needles, syringes, and related devices.
For community infection-control context, CDC materials on diabetes care infection control describe precautions used to prevent bloodborne transmission.
Recap
Now that you know what is a lancing device, focus on the habits that make testing safer and more comfortable. Use a compatible lancet, choose an appropriate depth, rotate sites, and keep the device clean. Use a fresh lancet each time, and place used sharps into a safe container right away.
Ask your healthcare professional when to test, what readings require action, and whether alternate-site testing is suitable for you. Seek medical advice promptly if finger puncture sites become increasingly painful, red, warm, swollen, draining, or slow to heal.
This content is for informational purposes only and is not a substitute for professional medical advice.
