
An insulin vial protector helps reduce breakage, improve grip, and keep a glass vial from sliding around in a bag. It does not keep insulin safe by itself. Safe storage also depends on temperature control, light protection, clear labeling, and a carrying setup that fits your routine. If you use vials instead of pens, the right accessories can lower the chance of broken glass, heat exposure, freezing, and mix-ups.
Key Takeaways
- Silicone sleeves mainly protect against slips, bumps, and small drops.
- Insulated cases help during travel, commuting, and hot or cold weather.
- Opened and unopened vials may have different storage instructions.
- Labels and organizers reduce mix-ups, especially with multiple vials.
- Damaged, frozen, leaking, or unusual-looking insulin should be checked before use.
How an Insulin Vial Protector Fits Into Safe Storage
An insulin vial protector is best understood as impact protection for a glass medicine vial. It works like a bumper. A snug silicone sleeve or cover can make the vial easier to hold, especially when your hands are cold, damp, or shaky. It may also cushion the vial if it knocks against a counter, bag zipper, or another supply.
That protection has limits. A sleeve does not refrigerate insulin, stop every type of breakage, or confirm that the medicine inside is still usable. It also does not replace the storage instructions on the carton, package insert, or label. Those instructions matter because insulin can be affected by freezing, overheating, strong light, and rough handling.
The safest setup usually answers three questions. Can the vial break? Can it get too hot or too cold? Can you identify the right vial quickly? A silicone vial protector helps with the first question. A cooler case, organizer, and date label help with the rest.
Why it matters: A case can prevent broken glass, but it cannot reverse temperature damage.
Five Accessories That Protect Vials in Different Ways
No single accessory solves every storage problem. Most people do better with a simple layered setup. Start with protection against drops, then add temperature buffering and organization based on how often the vial leaves home.
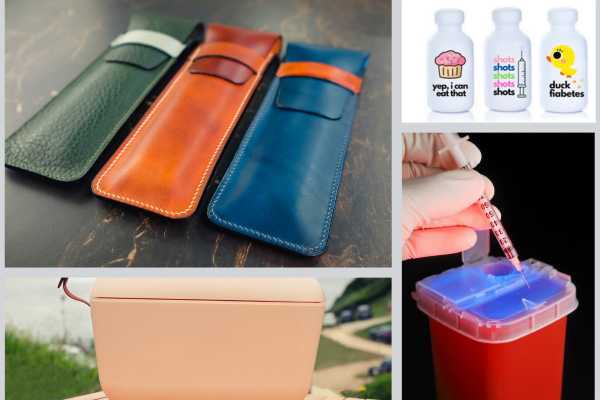
- Silicone sleeve or vial bumper: This is what many people mean when they search for an insulin bottle protector. A silicone sleeve wraps around the glass and adds grip. It can help protect against minor impacts and reduce slipping during dose preparation. Fit matters. A loose sleeve can slide, while a tight one may be difficult to remove or clean. Product-style options, including Vial Safe Insulin Protector accessories, should be viewed as impact layers, not complete storage systems.
- Hard-shell carrying case: A rigid case adds structure when a vial rides inside a backpack, purse, work bag, or suitcase. The key feature is not just a hard outer shell. The vial should sit securely inside, without bouncing against syringes, keys, pens, or other objects. A small divider can help keep supplies separated.
- Insulated travel case: An insulin vial travel case helps slow temperature changes during commutes, errands, flights, and long days away from refrigeration. Some cases use gel packs. Others use evaporative cooling. Either type can help, but the vial should not touch ice or a frozen pack directly. Freezing can damage insulin.
- Light-blocking pouch or carton: Light exposure is not the only risk, but it is easy to reduce. An opaque pouch, sleeve, or the original carton can shield a vial from bright light when it sits on a desk, in a clear bag, or near a window. This layer does not replace refrigeration or temperature control.
- Organizer, date label, or top cover: Labels and organizers prevent routine errors. A date-opened label can help you track when a vial entered use. A small organizer can separate current and backup vials. A top cover may reduce dust or friction in a bag, but it does not restore sterility after the original flip-off cap has been removed.
If you carry vials often, a sleeve plus an insulated case is usually more useful than color-coding alone. If you mainly store vials at home, a refrigerator holder, carton, and date label may be enough for daily organization.
Choosing a Case, Sleeve, or Holder for Your Routine
The right insulin vial protector depends on where the vial goes and what risks you face most often. A person who draws doses at home needs a different setup than someone who commutes, travels, or carries multiple injectable medicines.
Start With Fit
Fit is the first decision point. Many insulin vials are small glass containers, but accessory sizing can still vary. A case that is too large allows movement. A sleeve that is too tight may make handling awkward. Check that the vial can be inserted and removed without forcing it, and that the label remains readable when possible.
Some holders are designed for pens, not vials. Others are made for one vial only. If you carry syringes, alcohol swabs, or a backup vial, look for a layout that separates supplies without crowding them. Crowded storage can make inspection harder and may increase the chance of knocks inside the case.
Match the Accessory to the Setting
For home use, safe insulin vial storage often starts with the refrigerator location. Avoid areas where temperatures swing, such as the refrigerator door, if the product label recommends refrigeration. A small insulin vial holder for refrigerator use can keep the vial upright and separate from food containers.
For work or school, a compact sleeve inside a small insulated pouch may be practical. For travel, a sturdier insulin vial carrying case with padding and temperature buffering is usually better. If you spend time outdoors, in cars, or in very cold weather, plan for temperature extremes rather than just impact protection.
CanadianInsulin.com functions as a prescription referral platform. Where required, prescription details may be confirmed with the prescriber, while dispensing is handled by licensed third-party pharmacies where permitted.
Temperature, Light, and Label Rules Still Come First
Storage instructions can differ between unopened and opened insulin vials. Many unopened vials are kept refrigerated until first use. Opened vials often have product-specific room-temperature limits. The exact time and temperature range depend on the insulin, so the product label and pharmacist instructions should guide your routine.
Do not freeze insulin. Do not leave it in direct sun or in a parked car. Try to avoid placing a vial against a refrigerator wall that may run too cold. If you use a cooling pack, wrap it or place it in a separate compartment so the glass vial does not touch the frozen surface.
The flip-off cap on a new vial is mainly a tamper-evident cover. Once it is removed, the rubber stopper remains the access point. A cap, sleeve, or case can protect the outside, but it does not replace cleaning the stopper as directed or following the instructions for drawing up insulin.
Appearance checks also depend on the product. Some insulins are normally clear. Others are normally cloudy after gentle mixing, if the label instructs that. If insulin has frozen, leaked, cracked, changed appearance, or been exposed to unusual heat, ask a pharmacist or prescriber before using it.
Quick tip: Keep the carton or label insert until the vial is finished.
Travel Setup for Vials, Syringes, and Backup Supplies
A travel setup should protect the vial from impact and temperature swings at the same time. The simplest approach is a snug sleeve, a padded or hard case, and an insulated outer pouch when temperatures may change. This layered setup works better than dropping a loose vial into a toiletry bag or purse pocket.
For flights, keep insulin and related supplies in your carry-on bag rather than checked baggage. Checked luggage can face temperature changes that are hard to predict. For road travel, avoid trunks, dashboards, glove boxes, and parked cars. These spaces can become too hot or too cold faster than expected.
Hotel refrigerators need caution. Some mini-fridges freeze items placed near the back wall. If you use one, place the vial where it will not touch an icy surface, and check it before use. If the vial label recommends room-temperature use after opening, follow that product-specific direction rather than assuming refrigeration is always best.
- Carry-on placement: Keep insulin accessible during flights.
- Cold-pack buffer: Prevent direct contact with frozen gel.
- Backup separation: Store spare supplies in another pouch.
- Label access: Keep product instructions available.
- Post-trip inspection: Check for cracks, leaks, or changes.
Travel accessories vary widely. Some are mostly organizers with light padding. Some are cooling cases. Some are designed for pens and may not hold vials well. If your routine includes both vials and pens, you may also find it useful to compare Insulin Pen vs Syringe considerations for handling and portability.
Common Storage Mistakes to Avoid
Most storage problems come from ordinary habits, not rare events. A vial may be safe in the morning but exposed to heat, cold, or impact later in the day. The goal is to reduce predictable risks without making the routine too complicated.
- Using only a sleeve: Add insulation when temperature is a concern.
- Packing vials loose: Use padding or a fitted compartment.
- Ignoring opening dates: Label the vial when first used.
- Overcooling during travel: Keep frozen packs away from glass.
- Hiding the label: Make sure you can identify the medicine.
- Skipping inspection: Check after drops, leaks, or temperature events.
Cleaning is another practical issue. Silicone sleeves and hard cases can collect moisture, dust, and residue. Choose accessories you can wipe down and dry fully. Moisture trapped inside a case can loosen labels and make small cracks harder to see.
When a Product-Specific Protector May Help
A product-specific insulin vial protector can be useful when it fits the vial securely and matches how you carry supplies. For example, a taller sleeve may suit a taller vial shape, while a shorter version may fit smaller vial formats. Always check the product description and your vial size before relying on any case or cover.
Some readers compare general sleeves with specific accessories such as a Vial Safe Insulin Protector Tall option. The decision should focus on fit, grip, cleanability, and whether you still need a separate cooling or carrying case. A silicone sleeve may reduce breakage risk, but it should not be treated as a refrigerator, cooler, or sterility device.
If you also use insulin pens or support someone who does, storage needs may differ. Pens, cartridges, and vials have different handling patterns. For broader technique context, see How to Use Insulin Pen. Pet owners should follow veterinary directions; separate storage considerations are discussed in Pet Insulin Storage Tips.
A Simple Safer-Storage Plan
Start with the risk you face most often. If you drop vials or have trouble gripping them, choose a snug insulin vial sleeve. If the vial leaves home, add a padded case. If temperature changes are likely, add an insulated cooler case. If you manage more than one vial, use labels and dividers.
A practical setup might include one impact layer, one temperature layer, and one identification layer. That could mean a silicone sleeve, an insulated pouch, and a date-opened label. It could also mean a refrigerator holder, the original carton, and a separate travel case for days away from home.
If your insulin label gives different instructions from general storage advice, follow the label first. Ask a pharmacist or prescriber when a vial has been exposed to freezing, unusual heat, a hard drop, leaks, or visible changes. Safe storage is not only about avoiding broken glass. It is also about protecting the medicine before each dose.
Authoritative Sources
This content is for informational purposes only and is not a substitute for professional medical advice.
